

Buying guide
How to Use a Clamp Meter
AC, DC Zeroing and Wrong Readings
Learn how to use a clamp meter for AC and DC current: choose jaws or leads, zero DC offset, use a line splitter, and troubleshoot zero or unstable readings.
By thisMETER EditorialUpdated November 3, 20267 min read3 picks
On this page · Quick choices: check capability before changing tools
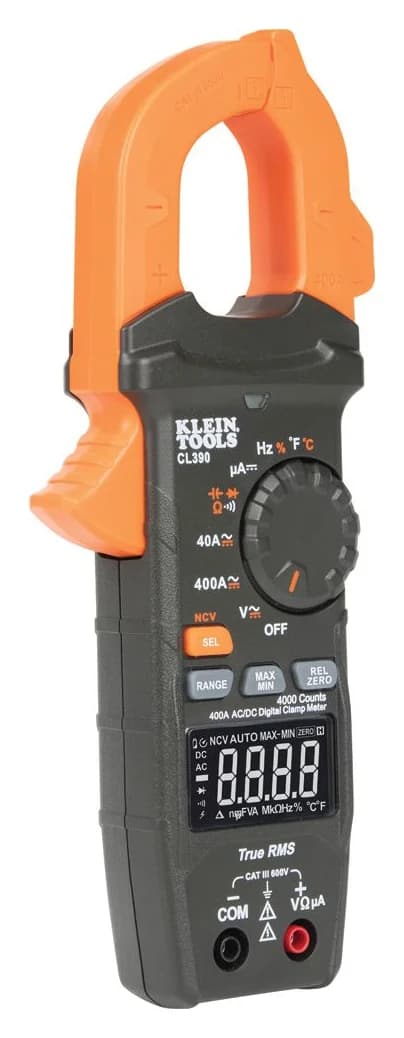
To measure amps with a clamp meter, disconnect the test leads, select A and the correct AC/DC mode, then close the jaw fully around one conductor and read the display. Before measuring DC, zero a DC-capable clamp with its empty jaw closed. Keep a compatible meter you already own; if yours lacks DC jaw current, the Klein CL390 is our upgrade pick for loads within its specifications, including its 0.3 A minimum. Klein operating instructions, Fluke zeroing instructions.
Quick choices: check capability before changing tools
These are manufacturer specifications, not readings from thisMETER. The smallest display step is resolution, not an accuracy guarantee.
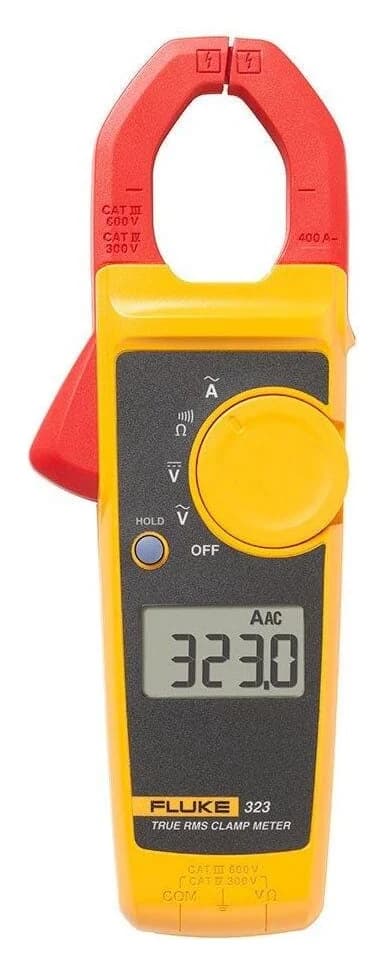
Fluke 323
- Safety rating, as marked
- CAT III 600V, CAT IV 300V
- Jaw-current capability
- AC only, to 400 A
- Important limit
- Match category and voltage; the lowest-rated lead or accessory limits the assembly.
All specifications
- Lowest current range / display step
- 400.0 A / 0.1 A
- Our recommendation
- Keep for compatible AC loads
Klein CL390
- Safety rating, as marked
- CAT III 600V
- Jaw-current capability
- AC/DC, to 400 A
- Important limit
- Match category and voltage; the lowest-rated lead or accessory limits the assembly.
All specifications
- Lowest current range / display step
- 40.00 A / 0.01 A
- Our recommendation
- Upgrade when DC capability is missing; minimum 0.3 A
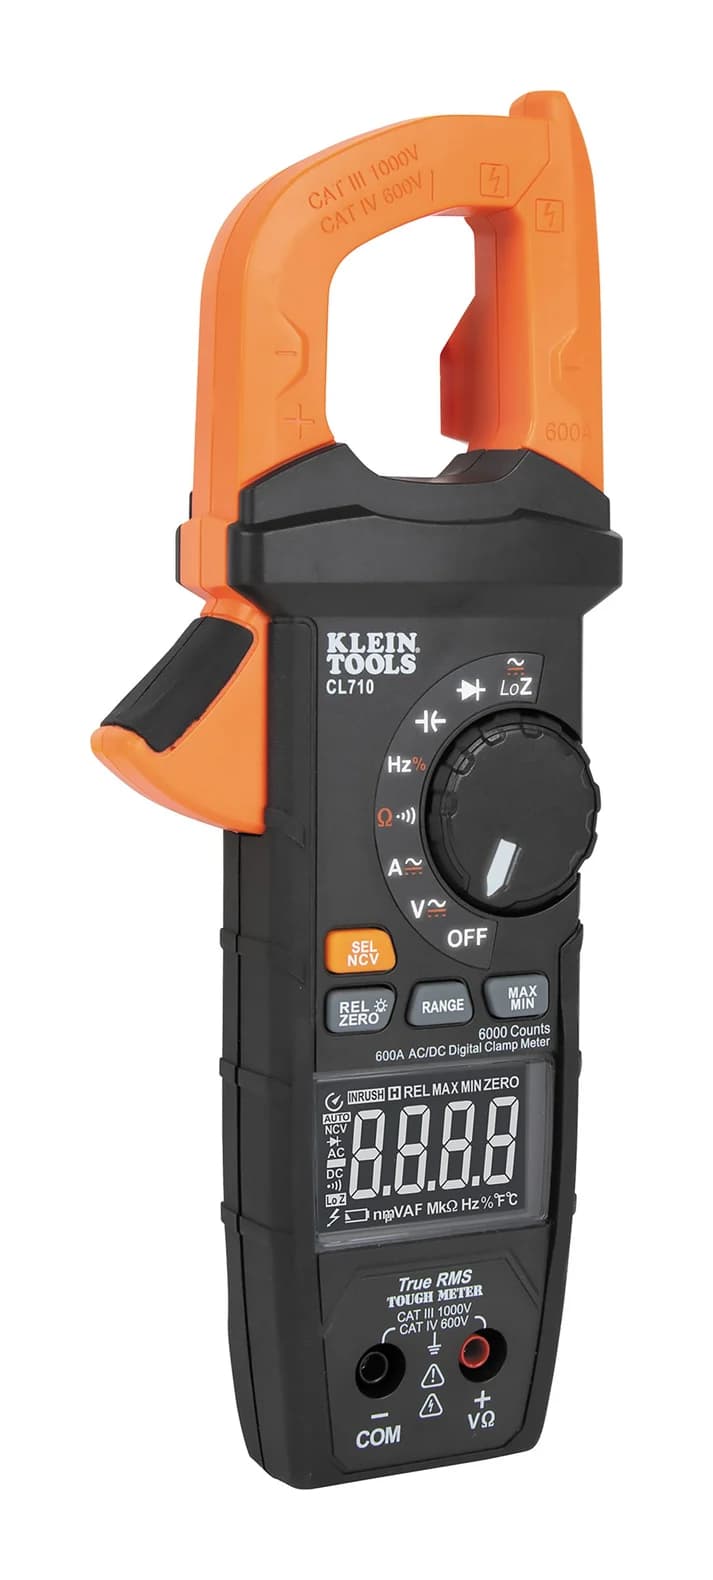
Klein CL710
- Safety rating, as marked
- CAT IV 600V, CAT III 1000V
- Jaw-current capability
- AC/DC, to 600 A
- Important limit
- Match category and voltage; the lowest-rated lead or accessory limits the assembly.
All specifications
- Lowest current range / display step
- 60.00 A / 10 mA
- Our recommendation
- Choose when the CL390's current range is insufficient
Full comparison table
Swipe to compare. Row labels stay visible.
| Meter | Jaw-current capability | Lowest current range / display step | Safety rating, as marked | Our recommendation |
|---|---|---|---|---|
| Fluke 323 | AC only, to 400 A | 400.0 A / 0.1 A | CAT III 600V, CAT IV 300V | Keep for compatible AC loads |
| Klein CL390 | AC/DC, to 400 A | 40.00 A / 0.01 A | CAT III 600V | Upgrade when DC capability is missing; minimum 0.3 A |
| Klein CL710 | AC/DC, to 600 A | 60.00 A / 10 mA | CAT IV 600V, CAT III 1000V | Choose when the CL390's current range is insufficient |
Scroll horizontally to see every column
| Meter | Jaw-current capability | Lowest current range / display step | Safety rating, as marked | Our recommendation |
|---|---|---|---|---|
| Fluke 323 | AC only, to 400 A | 400.0 A / 0.1 A | CAT III 600V, CAT IV 300V | Keep for compatible AC loads |
| Klein CL390 | AC/DC, to 400 A | 40.00 A / 0.01 A | CAT III 600V | Upgrade when DC capability is missing; minimum 0.3 A |
| Klein CL710 | AC/DC, to 600 A | 60.00 A / 10 mA | CAT IV 600V, CAT III 1000V | Choose when the CL390's current range is insufficient |
Sources: Fluke 323 manual, CL390 manual, CL710 manual. Klein specifies AC jaw-current accuracy at 50–60 Hz for both models.
Choose jaws or test leads
The CL390 manual separates clamp current from lead-based measurements. AC/DC voltage on the dial does not establish DC jaw-current capability. Check the current specification separately, as the Fluke 323 illustrates.
- Yes: Amps through the jaw: select A and the required AC/DC mode; disconnect test leads
- Yes: Volts, resistance or continuity: use the specified test-lead jacks and function
- No: NCV mode: detects the presence of AC voltage; it does not display load current
For lead-based work, see how to use a multimeter. Klein prohibits resistance and continuity checks on live circuits. This guide's practice setup uses a documented plug-in accessory instead of exposing wiring.
An accessible AC practice setup: use a documented line splitter
A whole cord encloses outgoing and returning current; their effects cancel. The Klein 69409 Line Splitter 10x provides access for clamp measurement without cutting the cord and is specified for all Klein clamp meters. Its instructions specify 110/125 V AC, 50/60 Hz, a three-wire outlet, and a maximum actual load of 15 A. It is for North American-style outlets, indoors and dry; do not adapt this example to a different supply.
With a compatible Klein clamp and a load within those limits, select AC amps, disconnect the test leads and follow the splitter's illustrated connection sequence:
Connect the splitter
Plug the 69409 into the specified receptacle
Connect the load
Plug the appliance or device into the splitter
Clamp and interpret
Close the jaw around the splitter as shown in its manual's figure; divide the displayed current by ten
Klein's example is 15 A displayed = 1.5 A actual. The multiplier does not raise the accessory's load limit: 15 A actual remains the maximum. Check your clamp's range against the multiplied reading; Klein's splitter FAQ advises starting on the highest amp setting.
Documentation conflict: Klein's product-page description mentions a standard section and a ten-times section; the linked 69409 manual documents the ten-times correction. Use the marked measurement location and the instructions supplied with your exact accessory. Do not assume an unmarked section gives a direct reading.
Close, position and zero the jaw correctly
The Klein manuals require a fully released trigger and completely closed jaw, with the conductor perpendicular through its center, aligned with the arrow markings. Fluke also specifies centering; its 323 manual warns that contamination on the mating surfaces prevents proper closure and causes measurement errors. Follow the maker's cleaning instructions if needed.
For DC, the CL390 and CL710 default to AC: press SEL/NCV to select DC and verify the display. With the closed jaw empty, let the display settle, then press REL/ZERO on these Klein models and check for ZERO. Now clamp the accessible conductor as the manual describes. Fluke's zeroing guidance specifies an empty, closed jaw before zeroing.
Do not zero around the loaded conductor: REL/ZERO subtracts the current value as an offset, so it would subtract the current you wanted to measure. The CL710 manual requires repeating DC zeroing if the range changes, and shows polarity markings for avoiding negative readings. The CL390 manual says not to use DC current measurement with a magnetic hanger attached because it can interfere.
Why the reading looks wrong
Work down this table before deciding the meter needs replacing. The remedies follow the manuals linked above and the splitter instructions.
Zero around an appliance cord
- Check first
- Both outgoing and returning conductors are enclosed
- Next action
- Use the documented splitter within its ratings; do not cut the cord
Zero after checking mode and conductor access
- Check first
- Is there load current to measure?
- Next action
- Check the load's operating state before interpreting zero as a fault
No useful DC reading
- Check first
- Does the meter specify DC jaw current, and does the display say DC?
- Next action
- Select DC on a capable model; a Fluke 323 cannot supply this function
Nonzero with an empty DC jaw
- Check first
- DC offset
- Next action
- Close the empty jaw, let it stabilize and zero as specified
Reading changes with jaw position
- Check first
- Incomplete closure or off-center conductor
- Next action
- Release the trigger fully, center the wire and inspect mating surfaces
Display does not follow a changing load
- Check first
- HOLD or MAX/MIN selected
- Next action
- Exit those modes to resume ordinary readings, following your manual
Negative DC reading on CL710
- Check first
- Clamp polarity marking faces the opposite direction
- Next action
- Align the markings as its manual shows; do not erase the reading with ZERO
Tiny current seems inconsistent
- Check first
- Minimum current and accuracy, not just display resolution
- Next action
- Check the lower-range specification before drawing a conclusion
Full comparison table
Swipe to compare. Row labels stay visible.
| Symptom | Check first | Next action |
|---|---|---|
| Zero around an appliance cord | Both outgoing and returning conductors are enclosed | Use the documented splitter within its ratings; do not cut the cord |
| Zero after checking mode and conductor access | Is there load current to measure? | Check the load's operating state before interpreting zero as a fault |
| No useful DC reading | Does the meter specify DC jaw current, and does the display say DC? | Select DC on a capable model; a Fluke 323 cannot supply this function |
| Nonzero with an empty DC jaw | DC offset | Close the empty jaw, let it stabilize and zero as specified |
| Reading changes with jaw position | Incomplete closure or off-center conductor | Release the trigger fully, center the wire and inspect mating surfaces |
| Display does not follow a changing load | HOLD or MAX/MIN selected | Exit those modes to resume ordinary readings, following your manual |
| Negative DC reading on CL710 | Clamp polarity marking faces the opposite direction | Align the markings as its manual shows; do not erase the reading with ZERO |
| Tiny current seems inconsistent | Minimum current and accuracy, not just display resolution | Check the lower-range specification before drawing a conclusion |
Scroll horizontally to see every column
| Symptom | Check first | Next action |
|---|---|---|
| Zero around an appliance cord | Both outgoing and returning conductors are enclosed | Use the documented splitter within its ratings; do not cut the cord |
| Zero after checking mode and conductor access | Is there load current to measure? | Check the load's operating state before interpreting zero as a fault |
| No useful DC reading | Does the meter specify DC jaw current, and does the display say DC? | Select DC on a capable model; a Fluke 323 cannot supply this function |
| Nonzero with an empty DC jaw | DC offset | Close the empty jaw, let it stabilize and zero as specified |
| Reading changes with jaw position | Incomplete closure or off-center conductor | Release the trigger fully, center the wire and inspect mating surfaces |
| Display does not follow a changing load | HOLD or MAX/MIN selected | Exit those modes to resume ordinary readings, following your manual |
| Negative DC reading on CL710 | Clamp polarity marking faces the opposite direction | Align the markings as its manual shows; do not erase the reading with ZERO |
| Tiny current seems inconsistent | Minimum current and accuracy, not just display resolution | Check the lower-range specification before drawing a conclusion |
Understand small readings before buying another clamp
Klein defines accuracy as ±(% of reading + least-significant digits). The CL390's 40.00 A range has 0.01 A resolution and ±(2.0% + 9 digits) accuracy: the digits allowance means nine display steps, in addition to the percentage term. Its stated minimum measurable jaw current is 0.3 A AC or DC. A finely changing display below that limit is not evidence of an accurate measurement.
The CL710's 60.00 A range has 10 mA resolution and ±(2.0% + 8 digits) accuracy. That higher maximum-current model does not automatically solve a small-current problem. Both Klein manuals specify accuracy at 18–28 °C, with temperature corrections outside that interval, and state accuracy for one year. These conditions matter when interpreting marginal readings. CL390 specifications, CL710 specifications.
Best DC upgrade when needed: Klein CL390
Klein Tools
A 4,000-count True RMS clamp meter that measures AC and DC current to 400 A, voltage to 600 V and DC microamps, with non-contact voltage detection in the jaw and a thermocouple for temperature.
Check package and model options
- 600 V max
- 400 A max
- 4,000 counts
- CAT III 600V
Choose the CL390 if your existing clamp lacks DC jaw current and its documented range suits the load. Its manual instructs using the 40 A setting for improved resolution when the current is below that range; the other setting reaches 400 A. Its separate 200 µA DC function uses test leads, not the jaw: that is not a microamp clamp mode. Remember the 0.3 A minimum before choosing it for battery-drain work.
Check price on Amazon · Official CL390 specifications
Best to keep for AC loads: Fluke 323
Fluke
A basic True RMS clamp meter rated CAT III 600V and CAT IV 300V that measures AC current to 400 A, AC and DC voltage to 600 V, resistance and continuity; it doesn't measure DC current.
Check package and model options
- 600 V max
- 400 A max
- CAT III 600V, CAT IV 300V
The Fluke 323 provides True RMS AC current to 400 A, but no DC jaw current. Its manual says to add 2% for position sensitivity. The family manual covers different models: the 324 adds temperature and capacitance, while the 325 also adds DC current and frequency. An illustration of the 325 does not give the 323 those functions.
Best for more current headroom: Klein CL710
Klein Tools
A 6,000-count True RMS clamp meter that measures AC and DC current to 600 A and voltage to 1000 V, with a low-impedance mode and non-contact voltage detection in the jaw.
Check package and model options
- 1,000 V max
- 600 A max
- 6,000 counts
- CAT IV 600V, CAT III 1000V
The CL710 extends AC/DC jaw current to 600 A and is marked CAT IV 600V, CAT III 1000V. Its LoZ function concerns voltage, not low-current sensitivity. Klein's feature bullet mentions a thermocouple, but its Included list omits one, its temperature-range field is blank, and the manual documents no temperature function. Do not choose it for temperature measurement on that conflicting description.
How we choose
We compare official product pages with model-specific operating instructions and accuracy tables. Recommendations here address a missing function, inadequate range or conductor access; they are based on the manufacturers' specifications. See how we choose and how we measure for the site's research and measurement policy.
Buying guide: replace a specific limitation
For missing DC capability, compare the jaw-current specifications. For a small-current problem, compare minimum current and the digits term, rather than maximum amps. For appliance-cord access, consider the documented splitter before a new meter. Our clamp meter picks cover purchase choices; clamp meter versus multimeter covers which type of tool fits the job.
Verdict
Start with the correct function, single-conductor access, complete jaw closure and DC zeroing where applicable. Keep a suitable AC clamp; choose the CL390 only when its DC capability solves your problem, or the CL710 when more current range is needed. Check small-current limits before trusting the display.
Our picks at a glance
- 1
Choose for: Keep for compatible AC loads
Check before buying: No DC current, so it can't read car, solar or battery current
- 2
Choose for: Upgrade when DC capability is missing; minimum 0.3 A
Check before buying: Rated CAT III 600V only: not for service-entrance (CAT IV) work
- 3
Choose for: Choose when the CL390's current range is insufficient
Check before buying: No DC microamp range, so it can't read HVAC flame-sensor current
Frequently asked questions
Why does my clamp meter read zero around a power cord?
A whole appliance cord contains outgoing and returning current, which cancel in the clamp. For ordinary load-current measurement, the jaw needs a single conductor. Klein documents its 69409 line splitter for appliance checks without cutting the cord, within its North American outlet and load limits. A zero current reading never proves wiring is safe to touch; Fluke explicitly warns against that conclusion.
Can an AC clamp meter measure DC amps?
Only if its current specifications explicitly include DC. The Fluke 323 measures AC and DC voltage through leads, but only AC current through its jaw. The Klein CL390 and CL710 support both AC and DC jaw current; both default to AC, so select DC and check the display. Zero the empty, closed jaw before a DC measurement, following the model's manual.
Why does a DC clamp show current with nothing in the jaw?
It can have a DC offset. Fluke instructs users to wait for a stable display and zero with the jaws closed and empty. On the Klein CL390 and CL710, REL/ZERO subtracts the current reading as an offset. Do this before clamping the conductor. The CL710 requires zeroing again if its DC current range changes; the CL390 manual also prohibits an attached magnetic hanger during DC current measurement.
Can I use a general clamp meter to check a tiny battery drain?
Check the minimum measurable current and per-range accuracy before trusting a small reading. Klein specifies a 0.3 A minimum for the CL390, despite its 0.01 A display steps on the lower range. Its DC microamp function uses test leads, not the jaw. Choose an instrument whose documented low-current performance suits the expected drain rather than assuming that any AC/DC clamp can resolve it reliably.
Related guides
Comparison · Clamp Meters
Fluke 323 vs 325: When DC Current Justifies the Upgrade
Choose the right Fluke clamp meter: AC versus DC current, accuracy at the same load, temperature-probe limits, and standard, CAL and reconditioned packages.
Comparison · Clamp Meters
Clamp Meter vs Multimeter: Choose by Current Range and Job
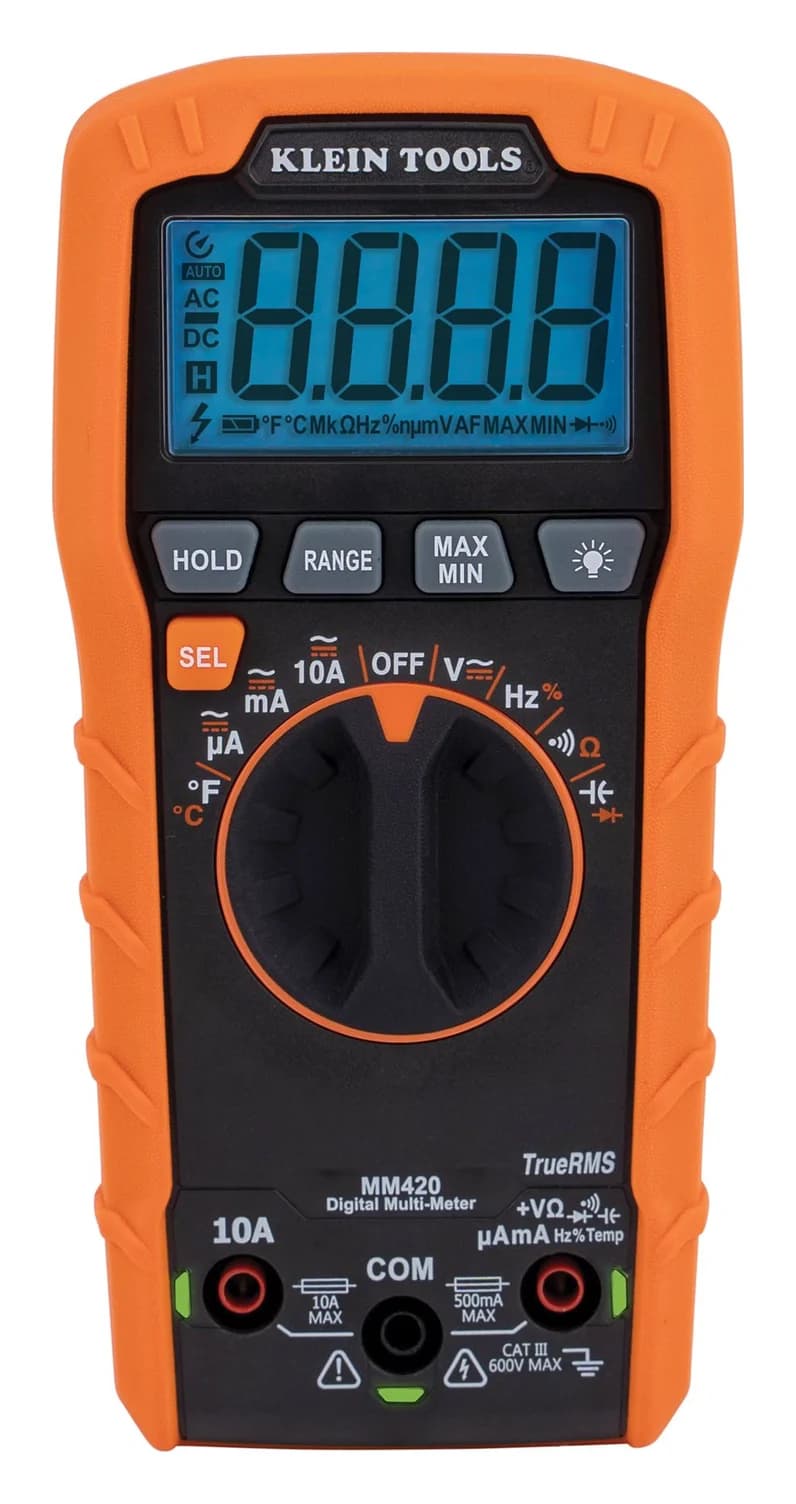
Choose a clamp meter or multimeter by AC/DC current, small-current resolution and lead functions, with clear Klein and Fluke picks and an appliance alternative.
Best picks · Clamp Meters
Best Clamp Meters: AC-Only vs AC/DC, and When You Need True RMS
Clamp meters picked by job: Klein's AC/DC CL710 and CL390 and Fluke's AC-only 323. Why DC current needs an AC/DC clamp, and why you clamp one wire, not a cord.